
After lots of feedback from social media, friends, and family – we were told we HAD to sand and we HAD to prime – before painting our cabinets.
Let us remind you – we live in a loft with a shared garage and little space for sanding. we were desperate to avoid sanding priming. We researched a lot on Chalk v Milk paint. We were concerned about the following:
– Quick Turnaround; we ideally wanted to finish within a couple of days
– Little prep; we don’t have the space to sand
– Ideal results; we were desperate for a paint that would last
After much research we found that Milk paint would give us more of a vintage link – could be chipped easily to create older looking furniture. We also read about sealing it with a wax (again, avoiding the Polyurethane because of our loft / location). A lot of reviews stated the wax would eventually turn a yellow color in high traffic areas due to dust and oils. In the end, neither of these things were what we wanted – despite the easy method of application / adhesion.
Chalk paint seemed like the ideal solution (everywhere we read suggested Annie Sloan’s). Chalk paint is thicker and we were hoping to get a clean matte look for our cabinets, with little effort.
NOTE: Both of these paint options came at a high cost (roughly $40/can).
We checked out these blogs for inspiration:
http://missmustardseed.com/2012/05/milk-paint-vs-chalk-paint-again/
After landing on a generica cabinet enamel brand, we were set.
We also determined to go with foam rollers – easy application and no steaks.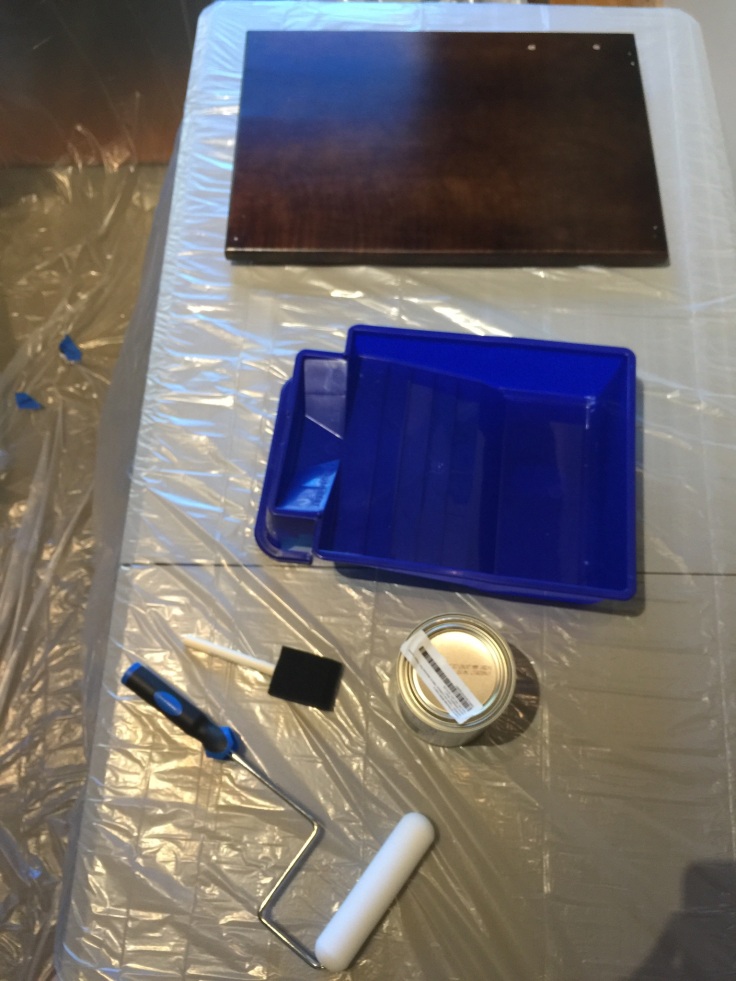


We picked up an 89 cent brush for the sides as well. Prior to painting, we wiped down the doors (removing all dirt and grime) using Lysol wipes.
We have over 20 doors and 12 drawers – but only took us a weekend to complete. No sanding, no priming and great coverage. Fairly easy project, but only just the start to a remodeled kitchen!
Hint: we tried both waiting and following the directions on the can for recoating. The can suggested an 8 hour wait time between coats. We applied once dry to the touch and let it cure for 24 hours without chips or smudges.

November 12, 2016 at 2:23 am
Wow! What a beautiful Job!!!
LikeLiked by 1 person
November 12, 2016 at 6:04 pm
I’m so with you; I’d definitely want to skip sanding/priming if at all possible. I guess the test is how long the paint job lasts?
LikeLiked by 1 person
November 12, 2016 at 7:09 pm
It’s been about a week since painting and we have had no chips from bumps or install / re hanging.
LikeLiked by 1 person
November 12, 2016 at 7:23 pm
Excellent. I *want* to believe in life without sanding & priming!
LikeLiked by 1 person
November 12, 2016 at 7:33 pm
i will mention we didn’t seal the doors. so i would imagine the paint will last even longer with a sealer. we wanted minimal work and the results were awesome!
LikeLiked by 1 person
November 16, 2016 at 1:42 pm
Hi! Thank you for sharing my post as one of your inspiration reads. May I ask, what paint did you end up using?? I hope your choice and method works out well for you. I wish you could have explored Fusion Mineral Paint as an option also–it’s an acrylic based paint that doesn’t require sanding, priming, OR sealing, it would have been the perfect option for you! Maybe in your next cabinet project?
LikeLike
November 16, 2016 at 8:04 pm
I haven’t seen that paint before! We used the Valspar Cabinet enamel paint that was able to be tinted using any shade that Valspar offers. While we normally are very tied to Behr paint, we decided to not take the drive to Home Depot for Behr and stick with what was convenient. We are in the process of moving and will most likely be renovating another kitchen in the next year and will have to keep this paint in mind!
LikeLike